Advanced Nano Banana Pro Prompts for Isometric Exploded Diagrams and Labeled Part Breakdowns ($0.09 per 4K Image)
Has anyone recently come across this kind of pixel-level character breakdown images on X? People are really going crazy with it — there are breakdowns of anime characters, beautiful girls’ outfits, toy figures, game characters, LEGO sets… literally anything can be disassembled. What exactly is being used to make these? What are the prompts? Today I’ll teach you in 5 minutes.

Which model is used to generate pixel-level breakdowns?
It’s using the Google Nano Banana Pro model, which is built on Google’s powerful Gemini 3 Pro. It has stronger logical reasoning capabilities and world knowledge, can understand complex instructions and physical laws, supports native 2K and 4K resolution output to meet professional printing needs, provides professional-level local editing functions (adjust camera angle, depth of field, lighting, etc.), and has enhanced text rendering capabilities, breakthrough solving the problem of blurry or incorrect text in AI images from previous versions — though Chinese text accuracy is still not 100%, you’ll notice some rendering isn’t completely correct in practice.
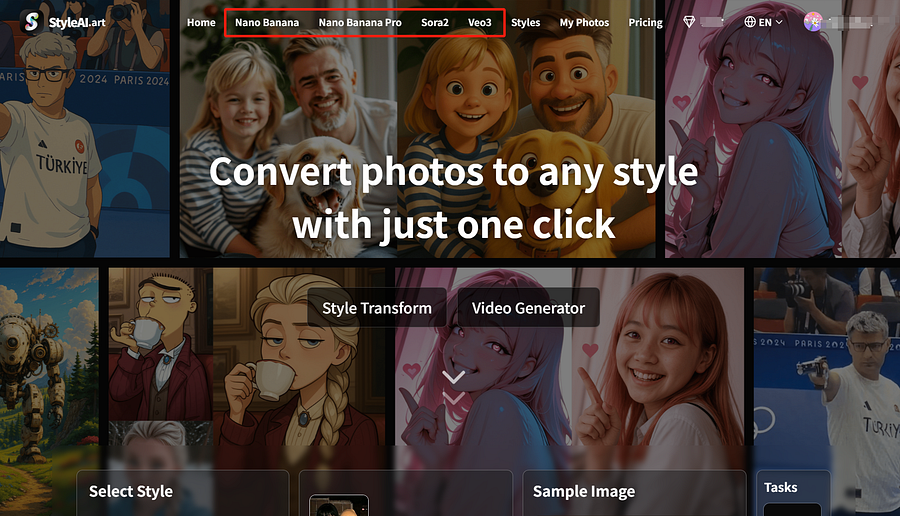
Because the official Google Gemini free tier offers extremely limited daily generations, non-Google AI Pro/Ultra members are quickly locked out and basically can’t use it. Everyone can instead go to StyleAI to experience Nano Banana Pro completely for free.
StyleAI is an AI image & video generation platform that domestic users can access directly (except Fujian province). It provides Nano Banana Pro, Nano Banana, Sora 2, Veo 3.0 and other models. New users receive 5 credits immediately, followed by 3 credits every day (resets daily, non-cumulative).
How to use it?
Because the official Google Gemini free tier offers extremely limited daily generations, non-Google AI Pro/Ultra members are quickly locked out and basically can’t use it. Everyone can instead go to StyleAI to experience Nano Banana Pro completely for free.
StyleAI is an AI image & video generation platform that domestic users can access directly (except Fujian province). It provides Nano Banana Pro, Nano Banana, Sora 2, Veo 3.0 and other models. New users receive 5 credits immediately, followed by 3 credits every day (resets daily, non-cumulative).
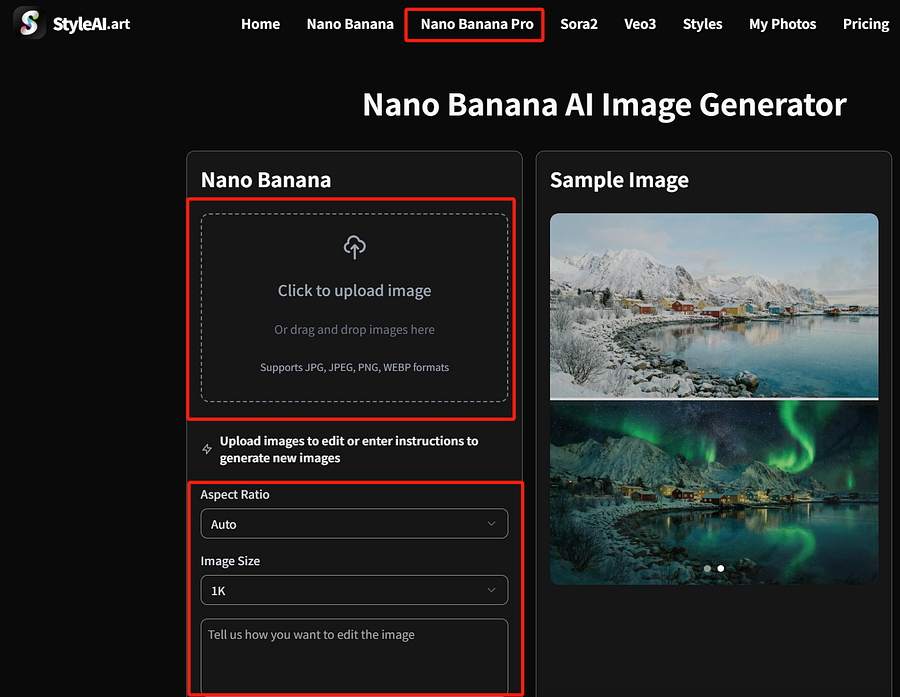
1.Visit StyleAi official website’s Nano Banana Pro model → https://styleai.art/zh/nano-banana-pro
2.Upload reference image, select size and pixels, input prompt
3.Generate
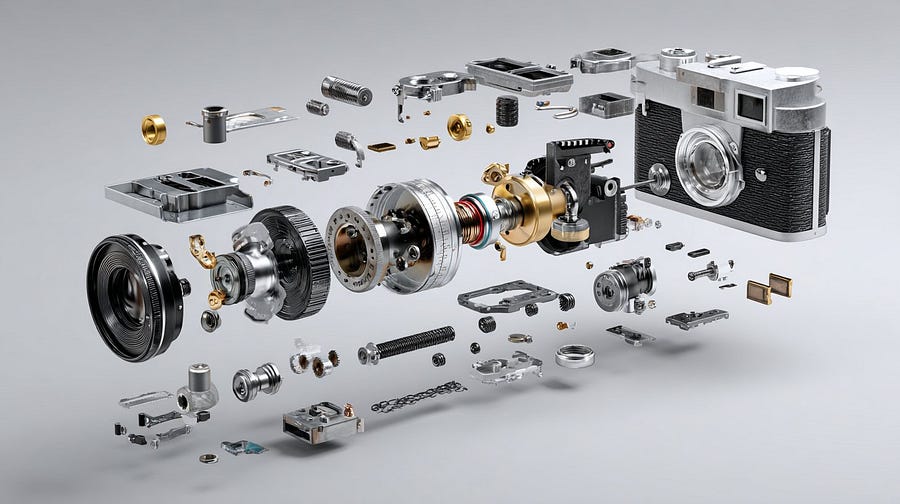
exploded engineering diagrams
Create a technical exploded view diagram of a [SUBJECT] in 1080x1080 dimension. The device is deconstructed showing all individual components floating in space, separated from each other to reveal internal parts. Each major component is labeled

Exploded View
An exploded view of [specific iconic object], disassembled parts floating in the air, detailed, high-resolution, photorealistic, studio lighting, neutral background, product photography, technical drawing elements, knolling layout, rendered 3D objects, floating components, detailed mechanical design.

Pixel-level character explosion diagram
Role Setting
You are a top-tier game and anime concept artist, specializing in creating detailed character design sheets. You possess the ability of “pixel-level disassembly”, capable of seeing through the layering of a character’s clothing, capturing subtle facial expression changes, and concretely restoring all related objects.
Task Goal
Based on the main subject image uploaded or described by the user, generate a “full-view deep character concept breakdown illustration”. The image must include a full-body standing illustration of the character in the center, surrounded by arranged displays of clothing layers, different expressions, core props, material close-ups, and highly lifelike personal and private belongings.
Visual Specifications
1.Composition Layout:
• Center position: Place the full-body illustration or main dynamic pose of the character as the visual anchor.
• Surrounding positions: Neatly arrange the disassembled elements around the center character in the blank space.
• Visual guidance: Use hand-drawn arrows or guide lines to connect the surrounding disassembled items to the corresponding parts or areas on the center character (e.g., bag connected to hand).
2.Breakdown Content — Core Iteration Areas: Clothing Layers:
• Disassemble the character’s clothing into individual pieces. If multi-layered, show the inner layers after removing the outer coat.
•New addition: Private inner layer disassembly — independently display the character’s underwear, emphasizing design and material.
Expression Set:
• Draw 3–4 different head close-ups in the corners showing different emotions.
Material Close-ups:
• Enlarge and highlight 1–2 key parts.
• New addition: Object texture close-ups, focusing on the material depiction of small items.
Related Items:
• No longer limited to large props; now include displays of the character’s “slice of life”.
• Everyday bags and contents: Draw the character’s daily commuter bag or handbag, “open” it, and scatter the items beside it that match their occupation, hobbies, personality, and lifestyle.
• Makeup and personal care: Display a makeup and skincare product set that fits the character.
• Private life objects: Items that cannot be casually shown to outsiders, most representative of their private life, emotional attachments, or inner world.
3.Style and Annotations:
• Art style: Maintain high-quality 2D illustration style or concept design sketch style with clean, sharp lines.
• Background: Use beige, parchment, or light gray textured background to create a design manuscript atmosphere.
• Text annotations: Simulate handwritten notes next to each disassembled element, briefly describing material or brand/model hints.
Execution Logic
When the user provides an image or description:
1.Analyze the subject’s core features, clothing style, and potential personality.
2.Extract primary disassemblable elements (jacket, shoes, major expressions).
3.Imagine and design secondary depth elements (underwear style? What private items would be in the bag?).
4.Generate a composite image containing all these elements, ensuring accurate perspective, unified lighting and shadow, and clear annotations.
5.Use English.

Nano Banana Pro API Integration Tutorial
For developers who want to integrate this function into their own applications or perform batch creation, you can call it via API. Here are two mainstream integration methods.
Official Integration
- Get API Key
- Visit Google AI Studio (aistudio.google.com/)
- In the left model selector, choose Nano Banana Pro (Gemini 3 Pro image)
- Open the API key management interface, copy your API key
- Enable billing: in the API key management page, click “Set up billing” next to the project and complete the billing setup as prompted
- Install SDK Python installation:
pip install -U "google-genai>=1.52.0"
pip install Pillow  # Image processing library
Node.js installation:
npm install @google/genai2.Basic image generation Initialize client
from google import genai
from google.genai import types
import base64
from PIL import Image
import io

# Initialize client
client = genai.Client(api_key="YOUR_API_KEY")
# Model ID
PRO_MODEL_ID = "gemini-3-pro-image-preview"
3.Generate first image
def generate_basic_image():
    """Basic image generation example"""

    prompt = "A cute cat playing on the grass, sunny weather"
    aspect_ratio = "1:1"  # Image aspect ratio

    response = client.models.generate_content(
        model=PRO_MODEL_ID,
        contents=prompt,
        config=types.GenerateContentConfig(
            response_modalities=['Image'],  # Return image only
            image_config=types.ImageConfig(
                aspect_ratio=aspect_ratio,
            )
        )
    )

    # Save image
    for part in response.parts:
        if image := part.as_image():
            image.save("generated_cat.png")
            print("✅ Image saved as generated_cat.png")
            return "generated_cat.png"

    return None
2.GrsAI Domestic Direct Interface
Everyone knows the official interface is extremely expensive — 1–2K image costs $0.134, 4K image costs $0.24. How can ordinary companies or independent developers afford it? So where can you find a cheap and stable Nano Banana Pro interface? GrsAI, as a source supplier of major AI model APIs, provides Nano Banana Pro in official format with 1K/2K/4K resolution images all at $0.09 each. Failed generations are not charged and credits are refunded.
1.Get API Key
- Visit GrsAI API: https://GrsAi.com
- Enter console
- Find APIKey on the left, click create
- View development documentation for different models
Method 1: Direct drawing interface (recommended)
The simplest way — one call completes image generation.
import requests
import json
import time

# Configuration
API_KEY = "Your API key"
HOST = "https://grsai.dakka.com.cn"    # Domestic direct node
# HOST = "https://api.grsai.com"       # Overseas node
# Generate pixel breakdown image
def generate_pixel_analysis():
    url = f"{HOST}/v1/draw/nano-banana"

    headers = {
        "Content-Type": "application/json",
        "Authorization": f"Bearer {API_KEY}"
    }

    # Build request payload
    payload = {
        "model": "nano-banana-pro",  # Use Pro version for best results
        "prompt": "Anime character pixel-level disassembly, showing clothing layers, expression changes prop details, exploded view style concept design sheet",
        "aspectRatio": "1:1",
        "imageSize": "2K",  # Optional: 1K, 2K, 4K
        "urls": ["https://example.com/your-reference-image.jpg"],  # Reference image URL
        "shutProgress": True  # Return final result directly
    }

    try:
        # Send request
        response = requests.post(url, headers=headers, json=payload, timeout=120)

        if response.status_code == 200:
            result = response.json()

            # Check status
            if result.get("status") == "succeeded":
                image_url = result["results"][0]["url"]
                print(f"✅ Generation successful! Image URL: {image_url}")
                return image_url
            else:
                print(f"⚠️ Generation failed: {result.get('error', 'Unknown error')}")
        else:
            print(f"❌ Request failed: {response.status_code}")
            print(f"Error message: {response.text}")

    except Exception as e:
        print(f"❌ Request exception: {str(e)}")

    return None
# Example call
if __name__ == "__main__":
    image_url = generate_pixel_analysis()
    if image_url:
        # Download or further process the image here
        print("Image generated, valid for 2 hours")
Method 2: WebHook callback method (suitable for asynchronous processing)
When generation takes longer, use callback to avoid timeout.
import requests
import json

API_KEY = "Your API key"
HOST = "https://grsai.dakka.com.cn"
WEBHOOK_URL = "https://your-server.com/callback"  # Your callback URL
def generate_with_webhook():
    url = f"{HOST}/v1/draw/nano-banana"

    headers = {
        "Content-Type": "application/json",
        "Authorization": f"Bearer {API_KEY}"
    }

    payload = {
        "model": "nano-banana-pro",
        "prompt": "Fashion outfit pixel disassembly, showing jacket, inner layers, pants, shoes layering details",
        "urls": ["https://example.com/fashion-image.jpg"],
        "webHook": WEBHOOK_URL  # Set callback URL
    }

    response = requests.post(url, headers=headers, json=payload)

    if response.status_code == 200:
        task_info = response.json()
        if task_info.get("code") == 0:
            task_id = task_info["data"]["id"]
            print(f"✅ Task submitted, ID: {task_id}")
            return task_id

    print("❌ Task submission failed")
    return None
# Callback interface example (to be implemented on your server)
"""
@app.route('/callback', methods=['POST'])
def handle_callback():
    data = request.json

    if data.get("status") == "succeeded":
        image_url = data["results"][0]["url"]
        # Process the generated image
        print(f"Received generated image: {image_url}")

    return jsonify({"code": 0})
"""
That’s all for today’s sharing about “pixel-level disassembly”. In the end, whether you just want to play around yourself or have a project that needs integration, the path is now very clear. All that’s left is to try it out. Hope this information is useful to you. Feel free to leave comments if you have questions.


评论
发表评论